Thursday, August 30, 2007

Getting my mind out of the Gutter


The fine folks from Professional Gutter & Drain installed the new gutters today. As I have spent many hours hauling buckets of water from our basement when it storms, I am very, very glad to see gutters on the house. Nice to get my mind out of Gutter-worry mode.

Monday, August 27, 2007

Let there be light(s).

So, Eric and I took a little detour to Great Indoors when our flight to New York (6:30AM) was cancelled last Friday (9/24) and delayed until late afternoon. We were there to check out entry door locksets. Alas, no luck finding the style we wanted there (Arts & Crafts). We happened past the lighting department and learned that all lighting and ceiling fans were 20% off (if you spent enough $$$) until 9/29. We were pretty sure we'd meet their challenge since we're outfitting an entire house from scratch! We stopped by on Monday night with our electrical drawings that spell out where all of the lighting in the house is located. And we went to work selecting the various fixtures. We started in the outdoors lights. In the photo below we chose the one in the center - a small version for on our bedroom balcony, the large version for the back porch. It's in a silvery bronze (not that you can tell from the photo) so we got a Minka fan for the back porch to match. (see here: http://www.farreys.com/i/ceiling_fans_minka/2007/lg/F574-BNW.jpg)
This is a kind of dark photo of the Emerson fan we chose for the master bedroom:
or here (http://www.emersonfans.com/catalog_detail.jsp?id=15&item=1)

This more traditionally styled Emerson for our living room:
(http://www.fanshack.com/store/index.cfm?fuseaction=showProductImage&Path=../i/Emerson/Olympia/KF100OZ.jpg&manuf=Emerson&series=Olympia)

And then we got crazy on the lighting for the dining/entry room. I think the brand might be Madison Avenue - or maybe the series name- but we bought 4 pieces it, so obviously we liked it! We got this chandelier for the main room, the wall sconce peaking out below for next to the front door, a single hanging unit for over the "bar" area and a squared-off flush mount for the ceiling at the base of the steps upstairs:

All in all, I think we spent about 2 hours, took home 9 fixtures and special ordered the Minka fan in rubbed bronze for the guest bedroom. (http://www.farreys.com/i/ceiling_fans_minka/2007/lg/F574-ORB.jpg)
The staffer helping us at Great Indoors was very helpful. She found all of the items, assured they were in stock and patiently rang up an extra discount we earned when 2 of the items incorrectly rang up for more than the posted price. (It's their policy to give you an extra 5% off if it comes up more expensively than posted- we'll take it!) We literally closed the place down and were the last customers loading stuff into our car. But our electrician starts this week and we're ready for him!

Monday, August 20, 2007

Painting Painting Painting


With the impending arrival of the gutters (maybe at the end of this week!) we've been working on painting the trim around the house. We picked up multiple gallons of two colors: "match" (which means that they matched it to the piece of the sage green aluminum cladding that will adorn our exterior windows) and Empire Gold. The "match" will go on all of the trim and eaves while the siding will be painted with the Empire Gold. I threw a first coat of the gold on the siding next to the porch last week. The rest of our work has been in the green color. We bought a brick house in large part because of the nightmares Eric has remembering painting our old (all wood shingle) house with my dad several summers ago. So, in theory, this one should require far less painting! When one considers the crazy roof angles on this house and that each of them have eaves...and they are not exactly easy to reach...this one is becoming quite the challenge as well. As I had the day off, I grabbed the remnants of a can of green paint, climbed out the west dormer, across the don't-ask-how-it's-suspended-scaffolding and onto a lower (and less slanty) roof to scrape off the old red paint in a reachable peak and replace it with a coat of our fresh green. About a half hour's work and that was going swimmingly. I was 90% done when a raindrop hit my arm. "No big deal, it's just a drizzle" I thought...and I had only an inch of paint in the can that was just enough to complete my task. The drops started coming harder and faster "ah, I'm protected by this nice little eave and I've only got another foot to paint, it will be fine" I say to myself. Just as I use up the final remnants of paint the sky opens and unleashes a downpour. I shriek and quickly but CAREFULLY hop across the roof, cautiously scale the scaffolding and dive into the dormer window just as the downpour increases and the wind starts delivering the rain in horizontal sheets. The HVAC guys working in the house who knew I was on the roof were heading upstairs to make sure I'd made it in and laughed at me as I was drenched from head to toe...but that section of the eaves had it's first coat of paint!!!

Friday, August 17, 2007

Andy and the Arch

The final project for our masons was to brick-in the area above the window on our front porch. This small section of the house was an addition completed probably 80 years ago. I assume that given the low roof line at the time (you can see it in the photo: the dark wood), no brickwork was done above the window. Our goal: brick up to the porch roof and match the arch which is over all of the other front windows. Below is the "before" photo.


Below: The bricks to be used to create the arch. To match the arch, we wanted to match the light-colored brick used in the other arches on the front of the house. The local brickyard didn't have a very good match. So I cannibalized some bricks from our old house's landscaping and they were nearly perfect. By coincidence, these yellow bricks were salvaged by me and Mary 9+ years ago when the city renovated a bridge within a few blocks of the new house. So in a way, the bricks have returned to where they came from.

Below: The new brick work and arch. The mortar will lighten up once dried.

Below: a few shots of the other tuck-pointing that Andy and Ed did yesterday.

In other news, the plumber has been working away installing all of the drain lines. Not very exciting photos, so I will spare you.

Thursday, August 16, 2007

Brickwork, Day 2

Yesterday Andy & Ed tackled cutting a new window into the brick wall. Below, they set the scaffolding and marked an outline of the future window.

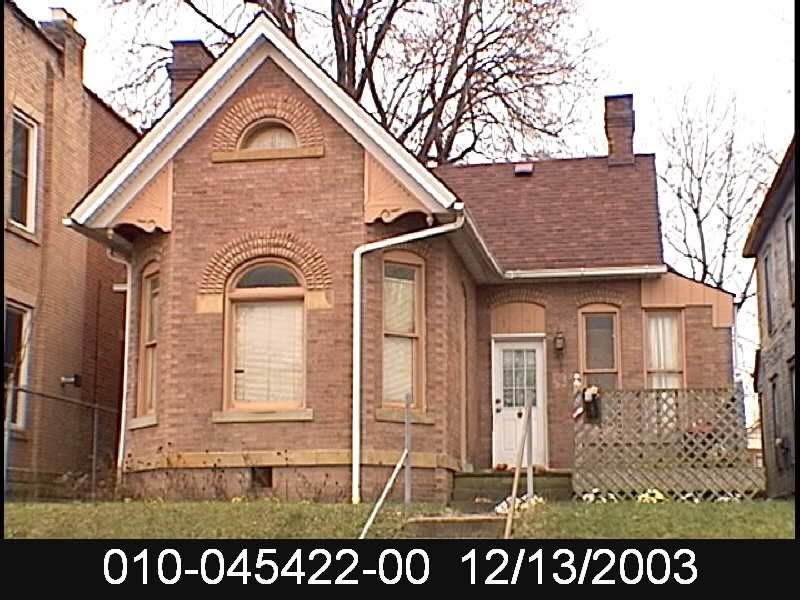
And at the day's end, they had cut the window and bricked an arch over it to match the rest of the house's windows.


Below is the inside view (before the arch was bricked). The window will be in the 1st floor bath. Don't worry, we'll have frosted glass.

Wednesday, August 15, 2007

She's a brick...house!

Our brick masons, Andy & Ed from GBR Masonry, began work yesterday. Below you see the LR fireplace in the post-demo condition. The firebox and brick-edge of the fireplace are all chewed up (not by us, it was that way when we bought the house) and we did not have the courage to see what was behind the wad of insulation stuffed up the chimney.


Below is the fireplace after Andy had torn out the firebox.

And below is the rebuilt mantle brick and box!

Below is a shot up the chimney, where Andy encountered the tomb of a half-dozen mumified sparrows. Yet another species to add to the list of animals who lived in our wild-kingdom house.

Tuesday, August 14, 2007

The first of many painting days


We picked out some exterior house colors and we were excited to get some paint on the trim to see how it would look. The green should be a match for our new windows' cladding.

Sunday, August 12, 2007

Thanks for the help, Sister!

Here is the backyard view. Note that the siding has been installed on the dormers as well as most of the trim. The rest of the siding will have to wait until the windows are installed. On Tuesday the metal roof over the balcony and the back porch will be installed, or at least so we are told. We arrived on Friday to find a DeMarco Roofing sign in our front yard, which confused us as we did not hire DeMarco roofing. But our contractors ordered the metal roof from DeMarco, so it is the delivery sign.


Here are a few shots of our joist-sistering project. The room feels quite open now that 2 metal posts have been removed.


Otherwise, while lying awake at 1:00 AM the other night, I realized that the plumbers were drilling the holes for our toilettes, but that they don't know if they are 10'' or 12'' on center drains. So I hauled the toilettes to the site so the plumbers could drill the drains in the right location.

As a bonus, here is a shot of our chuckle-head dog, Bogart, playing in Goodale park. Yes, Bogart is the one lying on the ground.

Friday, August 10, 2007

Line 'em up.

To date all of the work has been done by Phillips Renovation and its crew. This has been great as the work has been quality and timely, and we have had only one group to work with. From here on we start juggling different contractors for the remaining trades. Right now we have an HVAC crew on site and plumbers as well. Next week the electrician should start. Assuming that the framing, plumbing, HVAC and electrical work is inspected and passes, this will be followed by the insulation contractor and the gutter contractor. We also have a masonry contractor scheduled to begin on Tuesday and our windows contractor is scheduled to begin installation of all the windows in about 3 weeks. That leaves drywall, finish carpentry, flooring, framing/finishing of the porches, final installation of all fixtures and cabinet/appliance installation. So, as you can see, we're almost done.

In the DIY category, we began reinforceing the floor joists under the kitchen floor. The original 2x8 joists had been all cut up over the years to accomodate different plumbing schemes, leaving maybe 2'' of the original 8'' on 4 of the joists. To prevent these twigs from snapping, POs had placed steel posts in 3 places in the basement under the kitchen. To ensure a solid floor for our future tile floor and to get rid of the steel columns so the basement room is more functional, we began "sistering" new 2x8s to the existing joists. This posed a challenge from the outset, in that the stairway to the basement turns sharply at the end and a 12' long joist cannot be brought in down the stairs. So, I cut a whole in the plywood board which covered an old basement window and lowered the joists in through there. Next, we had to cut or remove any nails that would prevent the new joist from laying flush with the old joist. Finally, we had to cut the 12' joist down a bit, apply glue, set up a brace to support it, pound it into position (think sledge-hammer) and nail the new joist to the old joist. And since these joists and the subfloor above it are nearly 100 years old, pounding on them kicks up a century's worth of grit, grime and dust. Ahhh, reminds me of the demo stages.

On a similar subject, our plumber drilled a 4'' whole through the 8'' joists over the guest bedroom to accomodate the 2nd floor toilette drain. Now, this is a problem, as the building code only allows 1/3rd of a joists depth to be drilled. When called to the plumber's attention, the plumber told our framers to sister plywood to each side of the joist, which they did. But our architects and engineer could not sign off on that so the framers will have to sister those joists with full sized 2x8s as well. So while the first "solution" offered by the plumbers was a waste of time and money (I do have to pay my framers), better to catch the problem and resolve it before the pipes are in and the cost of correction is much higher.


Below: 4 inch holes in 2x8 joists.


Below: Ducts to the master bedroom hidden behind the back door.


Below: Where the HVAC guy wanted to put a supply, but that's where the plumber HAS to put the bathtub supply lines.

Friday, August 3, 2007

HVAC Contractors- boy do we need them!

So we met with the HVAC guys today - Keith and Rick. They were scouting the house for the purpose of determining where to place various vents and returns and how to run everything up to the second floor without making overly-obnoxious extra chases and soffits. Carolyn joined us as her crew will frame out the final product. We think we came up with pretty good ideas - one set will run behind the back door in the kitchen (otherwise unusable space) another will bump the bathroom wall a little further next to the study for a seamless chase. While it sounds like these decisions were easy to come by, they were not. It took about an hour and a half with five of us trying to decide what could or could not happen. And the house felt about 90-100 degrees. But we're happy with the conclusion. Eric put them in contact with the plumber to make sure they aren't vying for chase space! Also today I set up two more appointments for Monday. At 9 we're meeting with a guy who does decorative concrete flooring - because we just can't commit to what we're going to do to the floor in the kitchen and we want to investigate all of our options. Concrete can be stained and stamped to look like tile, dyed to have different colors and textued. We're not sure if this is the option for us, but we thought we'd consider it! And then the awesome Brad from M&M doors is coming out to measure. We're very excited about that!

Thursday, August 2, 2007

August 1 Photos

We walked the perimeter yesterday to review the progress. On the top of this window next to the condos we noticed the decorative detailing on the wooden part of the arch. We'd never noticed it before and thought it was neat!
The dormer has fascia and trim!

The massive i-beam was added to the basement yesterday for additional support. They inserted it by making a hole in the brick, sliding it in and supporting it. Then our mason, Paul will re-brick it into the structure and fill the hole. Presto! It will look like it's always been there!


Hardi-plank siding where the vinyl was stripped off (and we found the door...and the termite damage)...


The highlight of our day yesterday. I found this massive oak mantle on Craigslist. It is big...and old (the yellowed tag on the back says Marietta Mantle Company)...and VERY HEAVY! We ran out to Galloway to claim it from a guy who'd taken it out of his house and didn't want it. We JUST BARELY got it in to the van (we had to remove various pieces parts of the vehicle to make it fit) with his kind help. On the return trip we had the back of the van open with the lower 1/2 of the mantle sticking out as we made our way cautiously down Broad Street back to the house. Our AWESOME crew removed it from the van when we got there and our AWESOME neighbors let us stash it in their garage. And it FITS the fireplace right inside the front door (at least the cutout appears to be about right on)! And it has a perfect condition bevelled mirror! And it was UNDER $100! Rock on! Can ya tell I'm excited about it?